

VANOS, Polishing, Other Maintenance
- Feb 21, 2024
- 7 min read
Updated: Mar 9, 2024
By Febuary 2024 it was time for some maintenance!
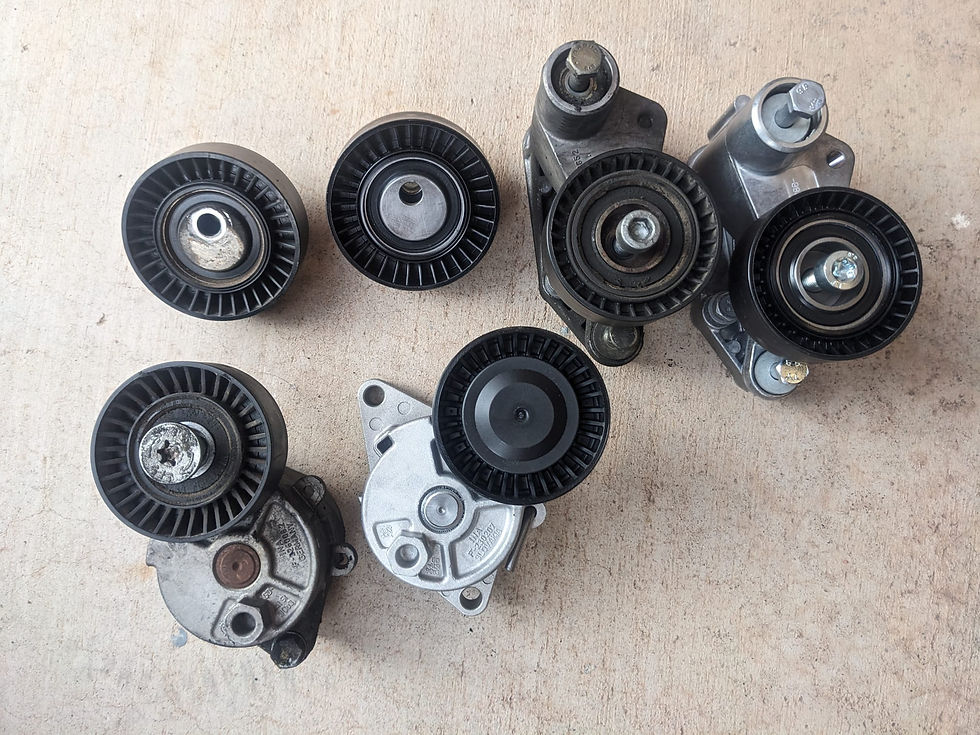
The pulleys had started making some noise so I am replacing all of the pulleys and installing new belts
Over the winter the engine was taking way too long to heat up and would stay below TDC on the coolant gauge when driving on the highway so a new thermostat is going in, which is a pretty common S54 issue
And I had a small oil leak I had tracked down to a valve cover gasket leak ...so since the valve cover gasket was going to be off I also decided to do preventative maintenance regarding the VANOS system and to do the valve shims while I was in there
How it started


Valve cover off. At this point I inspected the exhaust hub for the VANOS and was happy to see both tabs were intact.

Fan shroud and fan removed to allow access to the crank hub for the valve shims (and to set crank to TDC for VANOS work). Also allows better access to the thermostat which I'll do when the rest of the work is done.

First things first I tackled the valve shims. 10 were out of spec, the rest were just near the limit, but I wanted them all as close to "center" of the ideal specification as possible, or leaning towards loose as they tend to tighten over time - so I adjusted a further 6 while I was in there.
My shim removal tool for 8 years and numerous shim jobs has been a strip of credit card with a hole drilled and a small magnet shoved in it. It has worked flawlessly but on this job, the magnet started slipping out. So unfortunately, this will be the last job I will do with that tool. RIP my jerry rigged shim tool. Guess I'll buy the proper tool now.

With the valve shims done, I was ready to move forward with the VANOS job and the first step is to remove the VANOS unit

My workbench full of assorted S54 bits...

Below is the stock oil pump disc (on the right) compared to the re-drilled Beisan Systems oil pump disc (on the left). The stock pump disc has holes drilled just a little too large for the exhaust hub tabs. This means the exhaust hub is constantly hitting the end stops of the holes. Over time, this fatigues the exhaust hub, causing cracking of the tabs and eventually this causes them to shear off. This can have no signs or symptoms for a very long time, but eventually the tab can work it's way loose and damage the engine. Even worse, this hammering motion also causes the hub bolts to back out. There are multiple documented cases of these bolts getting caught in the chain, being yanked up and into the valve cover and punching a hole in the valve cover or being ripped down into the timing chain system causing all kinds of carnage.
Needless to say, it is better to address this before it becomes an issue. The solution is pretty simple, drill holes in the pump disc with tighter clearance to the hub tabs, preventing it from hammering the end stops. Beisan Systems takes stock oil pump discs and re-drills them with very slightly smaller holes. You can have a local machine shop do it too but Raj at Beisan Systems was the first to determine the root cause of this problem and develop a fix so, even though he is no longer with us, I think it's important to support the company who developed these products in the first place.

It's a little hard to see, but there is some evidence of the exhaust hub hammering dents into the oil pump disc holes. This allows even more clearance between the hub and disc which further exacerbates the problem.

The hardest part of this whole job, by far, was getting those four spring loaded pins into position. The instructions say to basically put them all in, squeeze them with both hands into position and slide into the retaining ring. This didn't really work for me, mostly because to get the pins to slide in, I needed to oil them slightly and when oiled, I just couldn't manage to grip all four. I ended up pushing one in, sliding it into the ring, pushing it against into the ring to depress it while putting the opposite one into place. Then I spun the pump disc within the ring perpendicular to it's installed orientation, giving me access to the other 2 - which I put in place and spun the disc back "flat". I also made sure to do all my attempts in the plastic bag used for removal (which was used to remove the disc in the first place per the Beisan instructions). This saved my ass multiple times, keeping the springs and pins from flying across my garage.

I also decided to do the solenoid plate seals. The old ones were completely flattened so i am very glad I did these too. Simple matter of cutting the old ones out and inserting the new o-rings. They are just a slight pressure fit.


I didn't picture any of the other seals going in, mostly because I was focused on following the instructions, but I did the other VANOS seals as well. These included the intake and exhaust piston, the intake interior seal and the solenoid valve piece. I also cleaned the solenoid pack and the VANOS oil filter per the instructions.

I was waiting on some parts from FCP Euro to arrive to finish the job, so I decided to spend some time polishing the VANOS unit. I also polished the air distribution rail and fuel rail so I think it should look great when the polished VANOS is installed. This was after the first pass of polish.

This was after maybe 8 passes. I took it even farther than this (I went a bit crazy with it) but it was really starting to look good here.

Compared to a stock unit.

My order from FCP was taking a bit longer to arrive than expected (not really their fault, just bad timing before a holiday weekend). So I took some time to polish all the bolts for the VANOS. It's a small detail but I've seen numerous people polish their units but leave the bolts stock. They are very quick and easy to polish and it really completes the look.

After probably 15 passes total it looked almost like it was chrome plated. I'm calling it finished at this point.

The VANOS and TPS wires also had cracked and broken sheathing that was disintegrating when you touched it, so I cut the remainder of the sheathing off and re-wrapped in tesa tape. I will be wrapping them in a fresh sheathing material as well.

The engine head was also quite dirty, I didn't take a before picture but it was really nasty. I suspect it was leaking from the VANOS perimeter gasket or from the solenoid. Either way, both of these gaskets will be replaced with brand new components so hopefully the leak doesn't come back and this area stays clean.

I also decided to install an upgraded upper timing chain guide while I was in there. I don't exactly understand the method of failure for that component, Raj had written an explanation of it... I read over it once, figured what the hell I'm in there anyways and just bought it. In for a penny in for a pound, and I also figured if I ever sell the car it'd be nice to be able to just say "I did it all". On that note, rod bearings are on the horizon to be done at some point as well.
Took some time to polish the thermostat housing as it was coming off anyways to do the thermostat. I also cut the extraneous little bits off the housing, I just thought it looked a little nicer without them but I doubt anyone will notice it when the part is installed.


I could have gone a bit further with the thermostat housing but it took a ton of work just getting it that far. It isn't super noticeable when everything else is in place anyways.
I then had to polish the oil filter housing cover too, obviously.


I have done some research on ways to remove cosmoline from the intake manifold I am going to experiment with. Worst case scenario if nothing works, I have a spare intake manifold sitting around somewhere.
Pulleys out (ok the new A/C tensioner was already being installed but it's a little finicky to get lined up so I didn't want to remove it just to take the picture)

Installed, new main accessory belt, A/C belt was out of stock but in good condition so not too worried about it

New thermostat, thermostat o-ring and two new o-rings on the water pipe


I did omit the engine support bracket - I figure if I'm ever in a position I need to remove the engine, removing the thermostat bolts to install the engine support bracket is a trivial task...
Pressure tested it as well, just to make sure everything sealed properly with the new o-rings. Held pressure perfectly which was good to see. I have new radiator hoses to go in and I'm also going to flush the cooling system once it's all buttoned up. Probably fresh fluids around the rest of the car too at least in the near future.
On most engines I would also do the water pump and maybe radiator at this time, but I have found these components on the S54 to be very reliable and with the belts off the water pump felt very smooth without exhibiting any play at the bearing. The radiator was also in excellent condition, I know it was replaced at some point fairly recently although I don't know exactly when.
VANOS hubs have to come off to replace the timing chain guide.


Very glad I replaced this, it was broken and the lower section was just sitting in place. It sits on top of the lower guide so the broken piece was sandwhiched between the chain and the lower guide, with I assume oil holding it in place once the chain was slackened.

New upper timing chain guide in place.

Installed new crush washers on the timing chain tensioner and the bolt for the timing chain guide.

New cam bolts going in with a little loctite.


Hubs back on with new bolts.

VANOS installed, found the VANOS spline "sweet spots" which made timing really easy.


New valve cover gasket and associated gaskets and crush wasshers.

Everything back together!

Now vs before:

Cleared adaptions and started it up... no errors, no codes and it gained a significant amount of low/mid torque! Pretty straightforward job all in all, a bit in depth but well worth it.
I put a few hundred miles on it pretty quickly and am really happy with how it's driving these days! Next I think I will focus on some performance upgrades

Comments